Android
Testmunk Android enable you to write automated functional testcases that you can run on various Android devices with different OS versions. Our goal is that you are able to reduce your manual testing time tremendeously. Following the installation you will be able to write testcases and let them run locally on your emulator and Android device as well as on a variety of Android devices over the cloud in the Testmunk device lab.
Installation
Install Calabash gem
In order to get started with Testmunk, you need to install the Calabash gem. Simply open your terminal window and execute:
$ gem install calabash-android
In case you don’t have the right permissions, please execute:
$ sudo gem install calabash-android
Hint
Calabash is a framework that allows you to write automated mobile application tests for iOS and Android. It provides APIs for mimicking input to the devices, and reading its output.
What is Calabash?
Danger
If you get an error that reads ...can't find header files for ruby at /System/..., that means you do not have the Xcode command-line tools correctly installed. Make sure you have Xcode installed (or download it here) and then run this command in Terminal:
$ xcode-select --install
Header files can’t be found
Danger
If you are getting an error that says “clang: error: unknown argument: ‘-multiply_definedsuppress’”, you must run these 2 commands instead:
$ sudo -i

$ ARCHFLAGS=-Wno-error=unused-command-line-argument-hard-error-in-future gem install calabash-android
This error is due to deprecated arguments for the clang executable that gem calls when installing certain extensions.
‘clang error’
Download and Install Android SDK
The Android SDK is the essential tool to build Android apps; by downloading it you will have access to a few tools that you need to test the app.
Download the latest Android SDK
After your download please copy paste both folders (sdk and eclipse) into your Applications folder.
Configure Bash profile
The Bash profile .bash_profile is a hidden file in your personal folder that you will need to configure for your Android SDK. After having moved the sdk and eclipse folder in your Applications folder, you can copy paste the following 2 lines into your .bash_profile:
export ANDROID_HOME=/Applications/sdk
export PATH=$PATH:$ANDROID_HOME:$ANDROID_HOME/tools:$ANDROID_HOME/platform-tools:$ANDROID_HOME/add-ons
After you have configured your bash profile, please close all terminal windows to affect your changes.
Hint
.bash_profile is a shell script that gets executed every time you open a new Terminal window. It deals with configuration for all of your Terminal commands. It can be found in your user folder, ~/.
Take into account that this file might not exist; in that case, create a new empty one.
Also consider that, since the filename begins with a period, this file is hidden. In order to see hidden files in a Finder window, run these commands in OS X Mavericks:
$ defaults write com.apple.finder AppleShowAllFiles TRUE
$ killall Finder
or these commands in OS X versions prior to Mavericks:
$ defaults write com.apple.Finder AppleShowAllFiles TRUE
$ killall Finder
What is a .bash_profile? Where can I find it?
Plug in your Android device
After you have plugged in your android device into your computer, open a new terminal window and execute:
$ adb devices
You should see output similar to the following, which confirmes that your device was recognized:
List of devices attached
605A000600000001015F3E001200C00B     device
In case you don’t see any output please confirm that you activated the “USB debugging” mode for your device. You can activate it by going to “Settings”.
Download the Testmunk sample application
We provide a simple Android app template for the purposes of this tutorial. To get this app, download or clone this GitHub repository.
In this tutorial, we will only be using the APK file, but the source code is included so you can take a look if you wish.
Preparing testcases
After you have downloaded the files open a new terminal window and navigate via cd to the TMSampleAndroid folder that you just downloaded. Then execute:
$ calabash-android run TestmunkTest_debug.apk --verbose
Danger
If this command returns an error that says “No keystores found. Please create one or run calabash-android setup to configure calabash-android to use an existing keystore,” then, run the following commands before continuing:
$ keytool -genkey -v -keystore ~/.android/debug.keystore -alias androiddebugkey -storepass android -keypass android -keyalg RSA -keysize 2048 -validity 10000 -dname "CN=Android Debug,O=Android,C=US"

$ calabash-android run TestmunkTest_debug.apk
No keystores found
You should get prompted to resign the app. Follow the terminal instructions to resign the app. After resigning please again execute:
$ calabash-android run TestmunkTest_debug.apk --verbose
This should install the app on your device, and after a minute or two it should get launched and our sample testcases should get executed. It will ca. 3-5 min for the testcases to get completed, you can also exit the terminal to stop the testrun. Simply enter exit into the terminal.
In the following we’d like to show you how you can easily write your own testcase.
Inspect app for elements
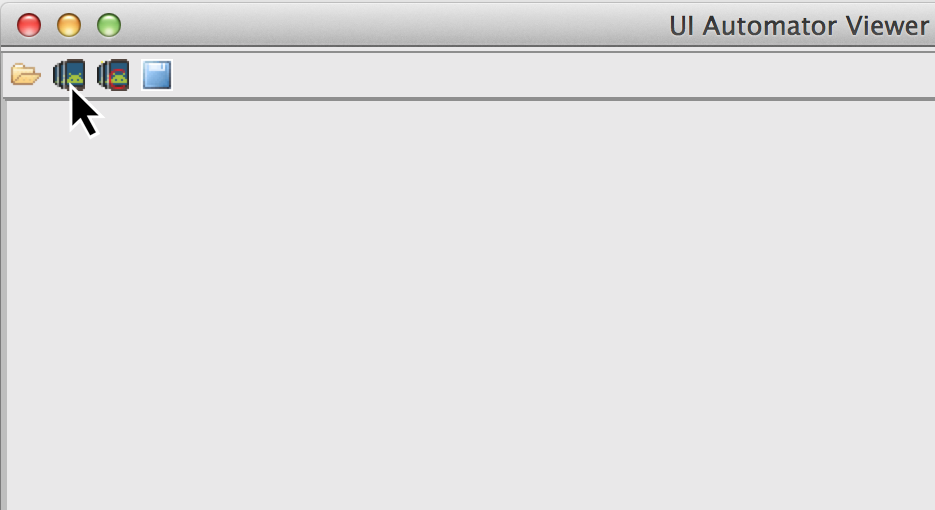
UI Automator Viewer
Please tap on the app on your device so that it is launched. Open a new terminal window and execute:
$ uiautomatorviewer
Hint
In case you need to install an APK file on your device, you can cd into the folder that contains it and use this command:
$ adb install NameofTheFile.apk
Installing APKs
On the newly opened window, please click on the device icon on the upper left corner to get an actual screenshot from the device.
This inspection is important to identify the right elements that you later will need for your testcases. For example the resource_id is needed when you use the teststep Then I touch view with id....
Important
If you use an Android version lower than API level 18 / Jelly Bean you will not be able to interact with the resource-id of the element.
Early versions of Android
Calabash console
A more advanced way of inspecting elements on the view is using the console. Open a new terminal window, cd into the folder that contains your APK file, and enter:
$ calabash-android console TestmunkTest_debug.apk
and then enter these commands:
> start_test_server_in_background

> query("*")
You should see a list of all visible elements.
Writing testcases
Within the sample app that you just downloaded, please open the my_first.feature file within the feature folder. These are some sample testcases that we scripted for a demo application. One testcase looks like this:
Feature: Testapp V.1.2

Scenario: 1) Going to next screen and back
        When I enter "Something" into input field number 1
        Then I press the "See details" button
        Then I wait
        Then I should see text containing "Something"
        Then I go back
        Then I should see text containing "test app"
In order to write a second testcase write a new testscenario. For example:
Scenario: 1) Going to next screen and back
        When I enter "Something" into input field number 1
        Then I press the "See details" button
        Then I wait
        Then I should see text containing "Something"
        Then I go back
        Then I should see text containing "test app"

Scenario: 2) Clear the input field
        When I enter "Something" into input field number 1
        Then I clear input field number 1
        Then I press the "See details" button
        Then I should not see "Something"
Once you have writen your testcases, it is necessary to save them. Running a testrun requires the feature folder (that my_first.feature is in) to be compressed to a .zip file. If you are using the testmunk website to run testcases, then the .apk file chosen should be your app, and the .zip file chosen should be the feature folder you just created.
Hint
For writing testcases, we recommend using Sublime Text 2 with the Cucumber syntax highlighting plugin.
Text editor suggestion
In case you were wondering where these steps come from, have a look at the Teststep library. These are all steps that you can be using right away. In case you’d like to extend and write your own steps, have a look into the .rb file in the step_definitions folder and the Calabash Ruby API.
Calabash Ruby API
Calabash offers a Ruby API that we support for defining special teststeps.
A new teststep is defined in the following way:
# Define a regular expression to catch the step
Then(/^"(.*?)" radio button should be selected$/) do |arg1|
  # Use calls to the Calabash API to get information
  if(!query("RadioButton text:'#{arg1}'", :checked).first())
    # Act on that information
    fail("The radio button with text #{arg1} should be selected")
  end
end
A teststep is considered succesful if the execution of its codeblock runs with neither explicit fails nor uncaught errors.
A nice way to try the different commands on this API is to run the Calabash console and test them.
Useful methods
This are some useful functions that the Calabash API provides. You can see more about them on the Calabash GitHub documentation.
query(uiquery, *args)
Query returns an array with the views on the screen that match it.
> query("FrameLayout index:0")

[
    [0] {
                        "id" => "content",
                   "enabled" => true,
        "contentDescription" => nil,
                     "class" => "android.widget.FrameLayout",
                      "rect" => {
            "center_y" => 617.0,
            "center_x" => 384.0,
              "height" => 1134,
                   "y" => 50,
               "width" => 768,
                   "x" => 0
        },
               "description" => "android.widget.FrameLayout{41f40dc0 V.E..... ........ 0,50-768,1184 #1020002 android:id/content}"
    }
]
Each result is a Ruby hash map object.
> query("FrameLayout index:0").first.keys

[
    [0] "id",
    [1] "enabled",
    [2] "contentDescription",
    [3] "class",
    [4] "rect",
    [5] "description"
]

> query("FrameLayout index:0")[0]["id"]

"content"
wait_for_elements_exist(elements_arr, options={})
Waits for all queries in the elements_arr array to return results before continuing the test.
wait_for_elements_exist( ["button marked:'OK'", "* marked:'Cancel'"], :timeout => 2)
touch(uiquery, options={})
Touches the first result of the query uiquery.
touch("FrameLayout index:0")
touch(query("FrameLayout"))
Running testruns
General
Testmunk Android enables you to run your testcases on:
- the virtual emulator
- on your plugged in Android device
- on a variety of Android devices with different OS versions in the Testmunk device lab.
Running locally on the emulator
Go to applications and start “Eclipse”. In the menu bar click click on Window > Android Virtual Device Manager and create an emulator you want to test on.
Running on your local device
Ensure that your device is being recognised by starting a terminal window and executing adb devices.
In order to run your tests on your device, please navigate via cd to your project folder and execute:
$ calabash-android run sample.apk --verbose
Your testrun should get executed on your device. It’s important that you use an apk file that is in debug mode.
Running on multiple Android devices
In order to run your testcases on Testmunk’s devices and see a report with your test results and screenshots, simply create an account, upload your apk file and testcases.
Image Comparison in Calabash
The goal of this post is to show how we can do basic image recognition using Calabash Android library.
Image comparison is another way that allows you to assert your tests using Calabash. However, Calabash does not support it by default. So, we have created some custom steps that you can include in your features folder, and you’ll have image comparison working in a short time.
Image comparison is a tricky topic. Some comparisons are as simple as pixel by pixel checking; very advanced scenarios may compare a small image within a bigger image, or even images which are slightly shifted or compressed.
We’ve chosen the simple approach for now, which means a pixel by pixel check. This check uses a difference blend, which is the same thing Github uses to diff images.
If we have pixelation, or an image that is slightly lighter or darker, the steps will still be able to make the comparison. Another benefit is that it returns a more realistic readout of percentage changed, and allows us to set maximum thresholds while testing.
If you want to compare an image (local or remote) with the current screen shot, it needs to match the resolution in order to be effective. The best use case is testing the app on a device that you already have the screenshots for.
To get up and running, we will need to install an extra gem to handle the image manipulation. We can do that using:
$ gem install oily_png
This is in addition to the calabash-android gem, which should already be installed and configured.
Once you have the gem installed, create a new file under features/step_definitions folder (with any name). Paste in the following code:
require 'oily_png'
require 'open-uri'
include ChunkyPNG::Color

def starts_with(item, prefix)
  prefix = prefix.to_s
  item[0, prefix.length] == prefix
end

# compares two images on disk, returns the % difference
def compare_image(image1, image2)
  images = [
    ChunkyPNG::Image.from_file("screens/#{image1}"),
    ChunkyPNG::Image.from_file("screens/#{image2}")
  ]
  count=0
  images.first.height.times do |y|
    images.first.row(y).each_with_index do |pixel, x|

      images.last[x,y] = rgb(
        r(pixel) + r(images.last[x,y]) - 2 * [r(pixel), r(images.last[x,y])].min,
        g(pixel) + g(images.last[x,y]) - 2 * [g(pixel), g(images.last[x,y])].min,
        b(pixel) + b(images.last[x,y]) - 2 * [b(pixel), b(images.last[x,y])].min
      )
      if images.last[x,y] == 255
        count = count + 1
      end
    end
  end

  100 - ((count.to_f / images.last.pixels.length.to_f) * 100);
end

# find the file
def get_screenshot_name(folder, fileName)
  foundName = fileName
  Dir.foreach('screens/') do |item|
  next if item == '.' or item == '..'
    if item.start_with? fileName.split('.')[0]
      foundName = item
    end
  end

  foundName
end

def setup_comparison(fileName, percentageVariance, forNotCase = false)
  screenshotFileName = "compare_#{fileName}"
  screenshot({ :prefix => "screens/", :name => screenshotFileName })

  screenshotFileName = get_screenshot_name("screens/", screenshotFileName)
  changed = compare_image(fileName, screenshotFileName)
  FileUtils.rm("screens/#{screenshotFileName}")

  assert = true
  if forNotCase
    assert = changed.to_i < percentageVariance
  else
    assert = changed.to_i > percentageVariance
  end

  if assert
    fail(msg="Error. The screen shot was different from the source file. Difference: #{changed.to_i}%")
  end

end

def setup_comparison_url(url, percentageVariance)
  fileName = "tester.png"
  open("screens/#{fileName}", 'wb') do |file|
    file << open(url).read
  end

  setup_comparison(fileName, percentageVariance)
  FileUtils.rm("screens/#{fileName}")
end

Then(/^I compare the screen with "(.*?)"$/) do |fileName|
  setup_comparison(fileName, 0)
end

Then(/^I compare the screen with url "(.*?)"$/) do |url|
  setup_comparison_url(url, 0)
end

Then(/^the screen should not match with "(.*?)"$/) do |fileName|
  setup_comparison(fileName, 0, true)
end

Then(/^I expect atmost "(.*?)" difference when comparing with "(.*?)"$/) do |percentageVariance, fileName|
  setup_comparison(fileName, percentageVariance.to_i)
end

Then(/^I expect atmost "(.*?)" difference when comparing with url "(.*?)"$/) do |percentageVariance, url|
  setup_comparison_url(url, percentageVariance.to_i)
end
If you are using local screen shots, add the source images to a “screens” folder at the same level as the features folder. You will use the name of these images in your test steps.
The following steps are available after injecting the library:
Then I compare the screen with "login_screen.png"
Then I expect atmost "2%" difference when comparing with "login_screen_fail.png"

Then I compare the screen with url "http://testmunk.com/login_screen.png"
Then I expect atmost "2%" difference when comparing with url "http://testmunk.com/login_screen_fail.png"

Then the screen should not match with "screen2.png"
You have three different types of steps. One asserts an exact match, another asserts an approximate match (i.e. up to 2%), and the final one reads if the image does not match (asserting if a particular view-changing action has happened or not). You can also use local files (which should be present in the /screens folder) or remotely uploaded files.
If there is a match failure, you will get the percentage difference in the output so you know how much of the screenshot was to the source.
Sources:
Note:
- This will work with Calabash iOS as well. However, for games using OpenGL, the screenshot utility of Calabash does not work.